|
This guidance is intended for the visitor. Departments can find additional guidance on the Finance Learning Hub |
Adding bank details
Before a claim can be submitted or paid, bank details must be entered in the user’s profile.
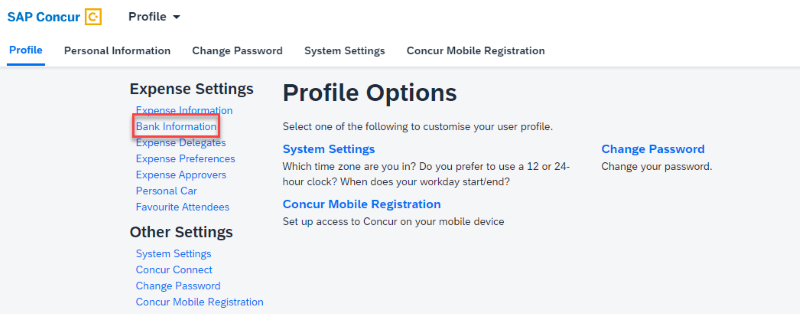
Step 1 - From the dashboard, select Profile Settings from the top menu.

Step 2 - Select Bank Information from the left menu.

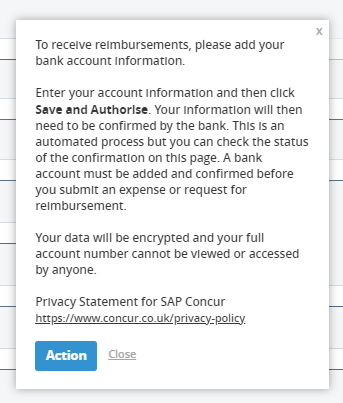
Step 3 - A privacy statement will be displayed, read this through and then select Action to continue to the bank information section.

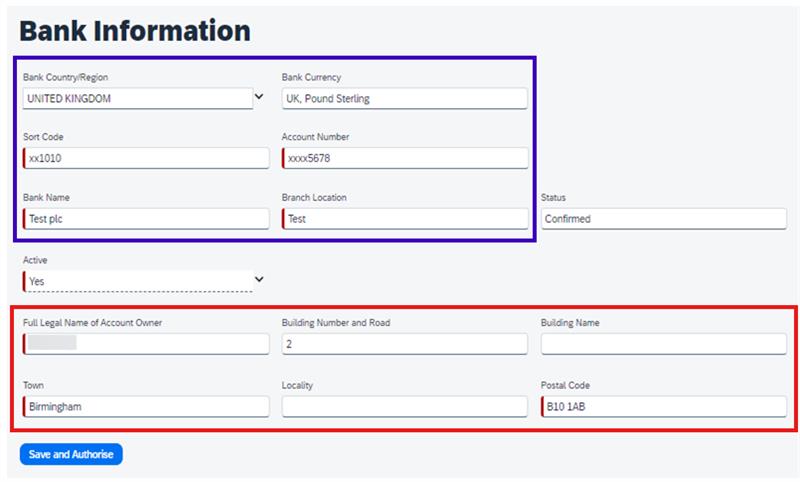
Step 4 - Complete the bank account information. If the bank details are incorrect the submitted claim will not be able to be paid.
- The top section (in the blue rectangle) is for the visitor's bank details
- The bottom section (in the red rectangle) is for the visitor's name and address associated with the bank account - it is not for the address of the bank headquarters or branch.
- The status field is not editable (and so can be ignored)
- The active field will presumably always be "Yes" and so can just be ignored.
- Either the 'building number and road' OR the 'building name' should have an entry, but a pop-up advises you of this.

Click Save and Authorise to save.
The account history section at the bottom of the page, displays a list of all the bank accounts that have been associated with the account, when they were last updated and who updated them.

